Ravitz
Violin
Shoulder Rest
|
|
|
|
|
|
|
|
|
|
|
|
|
|
|
|
|
|
|
Ravitz Violin Shoulder Rest
I am no longer selling these shoulder rests.
If you have any questions, contact me -
Cary Ravitz, 859-263-5087, caryravitz_at_gmail.com (replace _at_ with @).
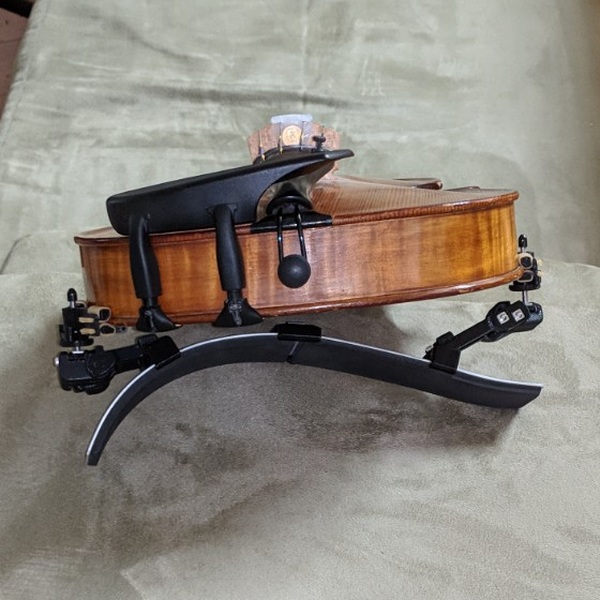
This shoulder rest is for your left shoulder. I will make a reversed copy, for right shoulder players, on request.
For violas, I can use 1 cm longer legs, on request.
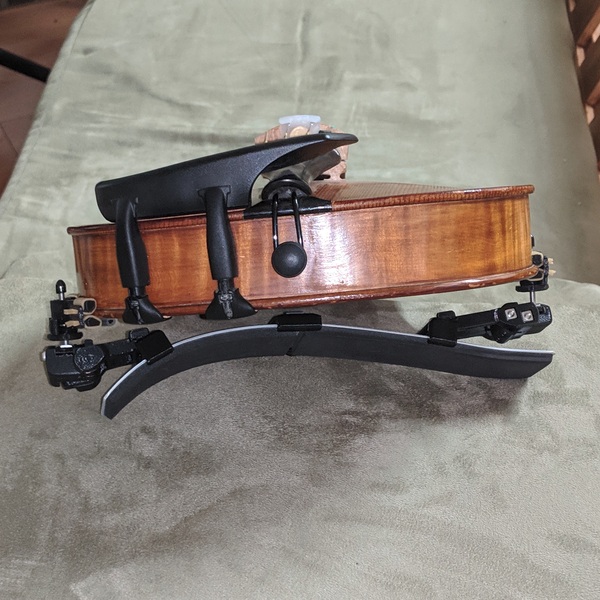
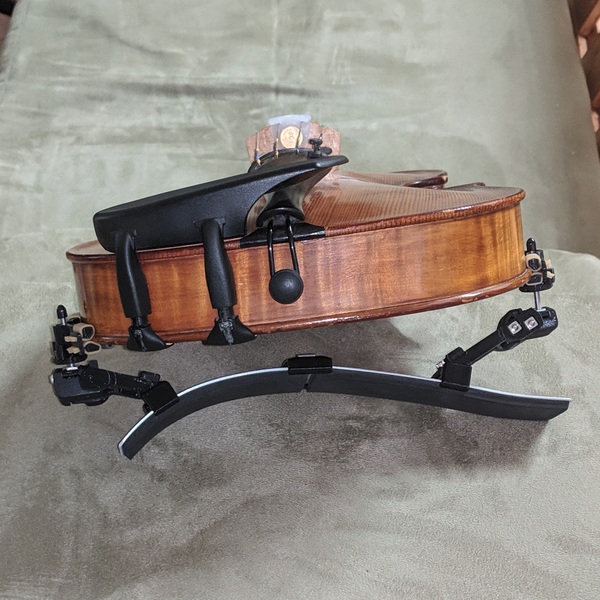
This shoulder rest is more adjustable that any other shoulder rest currently available. Adjustments include
- Malleable (bendable) aluminum shoulder plate, 8.5 inches for a short/traditional plate or 9.5 inches for a long/hooked plate.
- Both feet can be adjusted for height, angle along the shoulder plate, and angle across the shoulder plate.
- The height of each foot can be adjusted from high to very low.
- Both feet can slide along the shoulder plate to adjust for violin width and location of the violin on the chest.
The attachment to the violin minimizes interference with sound and is quick and secure -
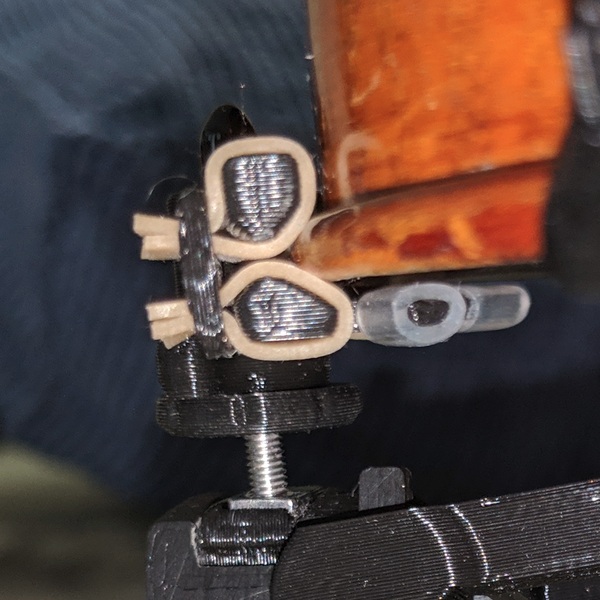
- The violin plate grip surface is 1/32 inch of latex rubber at 45 degrees above and 60 degrees below the middle
of the plate edge radius.
- The latex surface of the plate grip is very grippy and does not easily slide on the plate.
- The violin plate grips do not touch the violin ribs or the bottom of the plate.
- The violin plate grips pull apart and are held against the violin plate by an adjustable torsion bar spring,
giving a consistent force at any width.
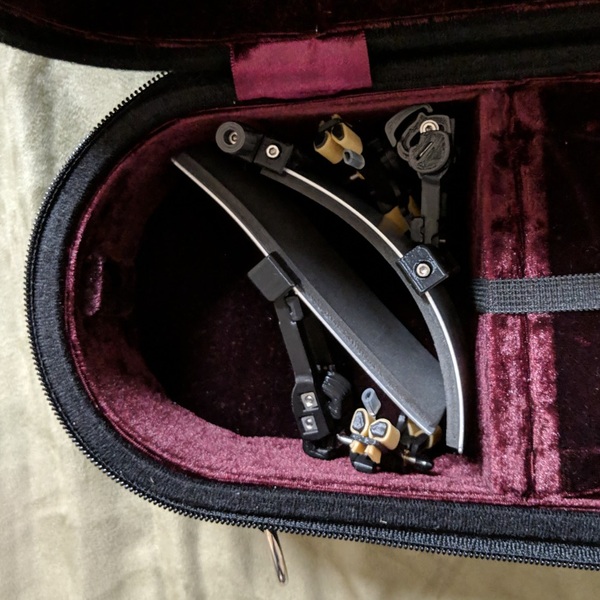
Storage of this shoulder rest is easy -
- The shoulder plate splits and the two halves are securely joined
by a thumbscrew.
- Both feet fold to further reduce storage space.
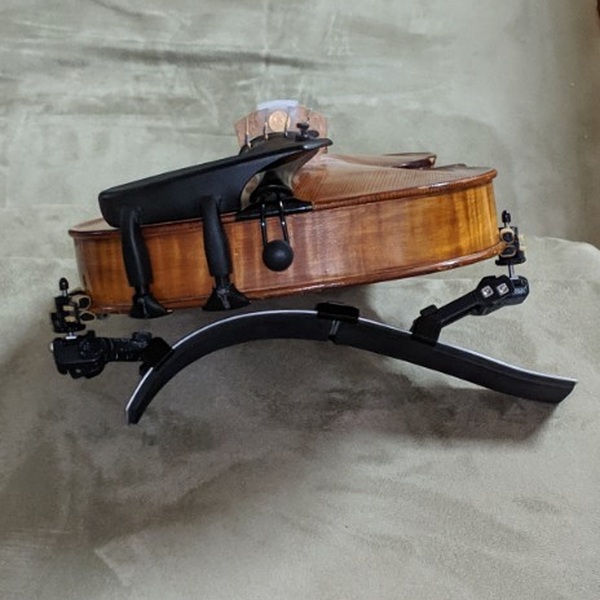
If you are looking for a very high shoulder rest - I believe it is much
better to have a high chin rest and a low shoulder rest than the
reverse. When you have a high chin rest and low shoulder rest the violin
sits lower making bowing easier and it makes the violin more stable. With
a high shoulder rest
any force on the shoulder plate is magnified on the plate grips by the
long lever arm, making it inherently less stable. These chin rests might
be helpful - Kreddle, SAS, Wittner Augsburg, and Messiah style. And some
people just add cork blocks under their chin rest.
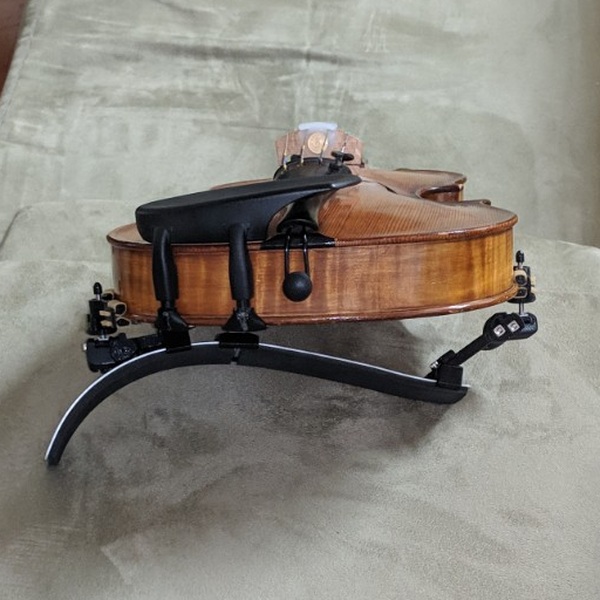
This shoulder rest can be set very high on the chest/lower side to allow
for a relatively level violin,
but height on the shoulder/upper side is limited to prevent instability.
These shoulder rests are handmade, on demand. I finish each (3D printed)
plastic part and the aluminum shoulder plate by hand
and assemble, set up, and test each shoulder rest.
Important note
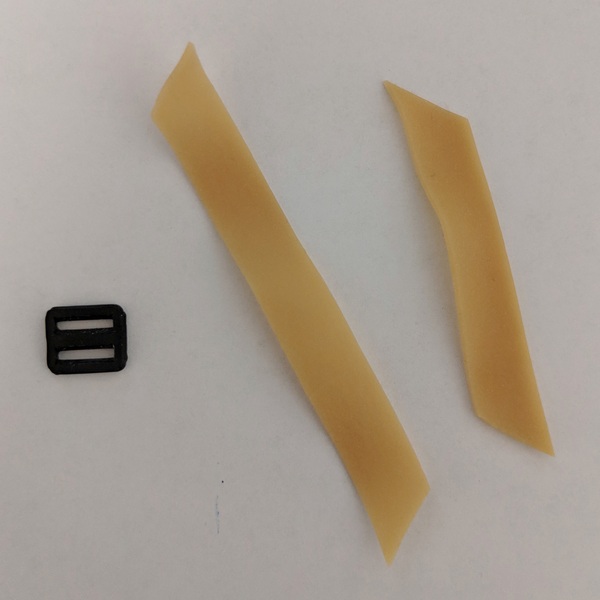
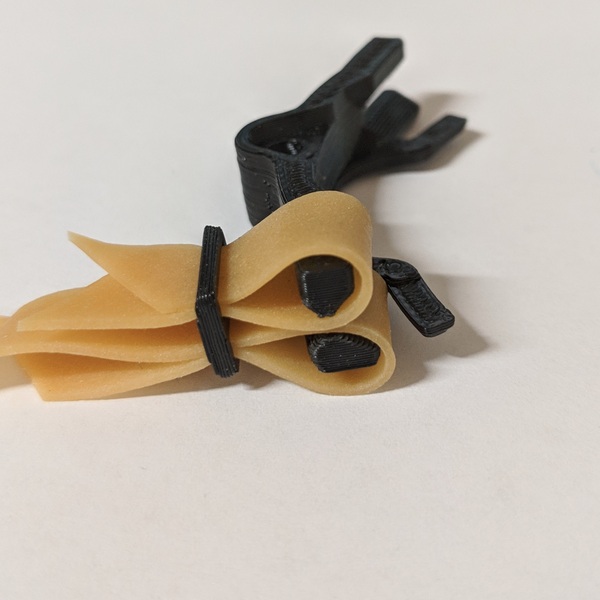
Starting in March 2019, new Ravitz shoulder rests use a new plate
grip cover. Instead of latex rubber tubes, the new covers are rubber
bands, 3/8 x 1/32 inch, cut and held by a collar (see photos).
The design of the plate grip plastic is the same so the
new covers work on the old shoulder rests.
The new covers are soft and grip well without being tacky or sticky.
And they are easily replaced (see instructions below).
The reason for this change is that I am unable to find suitable rubber
tubing. Currently available latex tubes (and other materials) do not provide enough
grip to hold the position on the violin plate.
What is new
Ongoing Improvements -
- A small shelf was added beside the leg height bolt to ensure that the bolt cannot contact the violin.
- A number of parts have been strengthened - I have never had a part fail in normal usage, but there have been a couple of parts
break when a bolt is over-tightened or the shoulder rest is dropped onto a hard floor. These and similar parts have been strengthened.
- The lower half of the short shoulder plate is now the same as the lower half of the long shoulder plate - only the top piece is different. This
is so that you can switch types easily.
- The plate grip has a larger gap to the violin in between the gripping areas. This is to accomodate smaller violins.
- The width of the plate grip was reduced slightly to make it easier to fit in violin case pockets.
- Various parts have been modified to speed assembly - these do not affect function.
- The shoulder plate foam is now 4 mm instead of 3 mm.
- The plate grip cover latex tubes have been replaced by rubber band segments held in place by a collar.
- The plastic parts are now ABS. This is lighter (about 5% less total weight) and more resilient.
- The bolt in the knob that allows the shoulder plate to be split now includes a nut and washer so that it won't slip and will not have plastic on plastic bind.
If you would like to get the latest version, contact me. (These changes do not affect function in normal usage.)
Installing the shoulder rest on the violin
This shoulder rest is attached to the violin similarly to many
others, but it does not install like these rests because of the spring loaded violin plate grips.
To install the shoulder rest on the violin, unfold both sides, put one of the violin
plate grips on the violin, pull out on the other grip, position it, and
release it. Make sure that the violin plate is fully seated on both sides of each plate grip.
The parts
The shoulder plate
The shoulder plate is malleable aluminum with 4 mm foam. It may
bent repeatedly to form to your shoulder or chest.
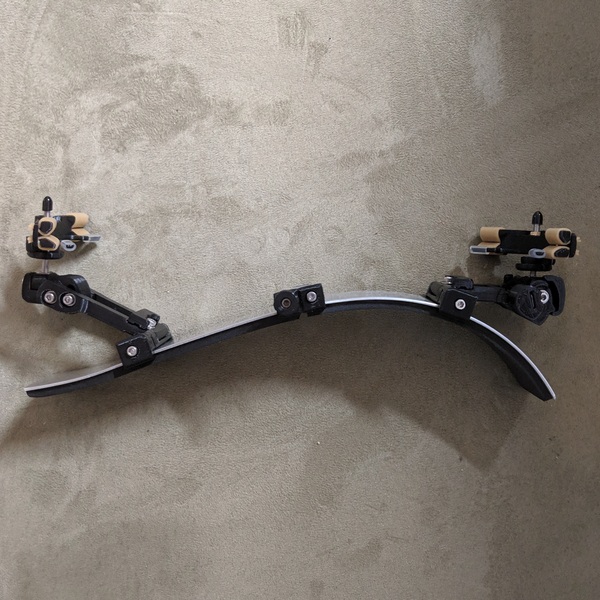
The foot assemblies
The foot assemblies connect the shoulder plate to the violin plate.
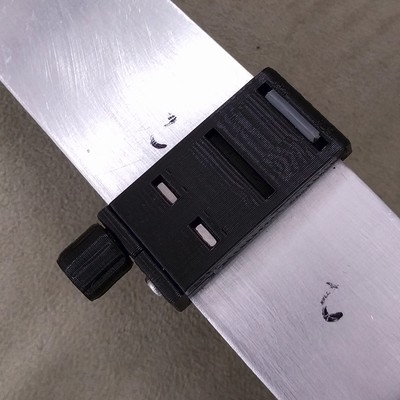
Both feet slide along the shoulder plate as needed - loosen the bolt on the side of the foot, slide the foot, and retighten.
The tightness of this bolt lets you make the leg hinges harder or easier to move.
On both feet, the first hinge folds toward the middle for storage and a bolt slides in a slot across the shoulder plate
that when tightened limits
the unfolding of the foot to set the height.
This height adjustment has five steps, minimum (0 degree) and maximum (45 degree) are set with the bolt moved to the ends of the slot.
The three middle height steps can be seen with the leg unfolded and the bolt should be centered on the appropriate step.
On the lower foot, at the free end of the hinged leg, the vertical bolt angle is set by two bolts that tighten a bracket. These need to be tightened a bit beyond snug.
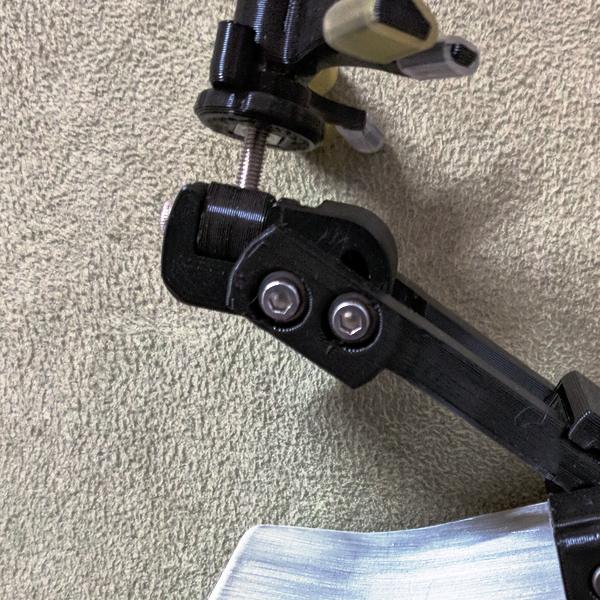
On the upper (spring loaded) foot, the vertical bolt angle is set only by the foot location on the shoulder plate.
At the free end of the hinged leg, there is a slotted force control bracket, held by a bolt. After the vertical bolt
angle is set, the force control bracket is rotated until
the arrow is roughly centered between the stops. To increase the spring force, rotate the arrow away from the shoulder plate. The
arrow also acts to stop the rotation of the the bracket, so it should always be set to allow both up and down motion.
On both feet, the third hinge adjusts the shoulder plate tilt, i.e. the vertical bolt angle as seen from the end.
It is tightened with one bolt. Make sure that the two
plate grips are parallel when sighted from the end. This ensures that the violin plate sits securely in the plate grips.
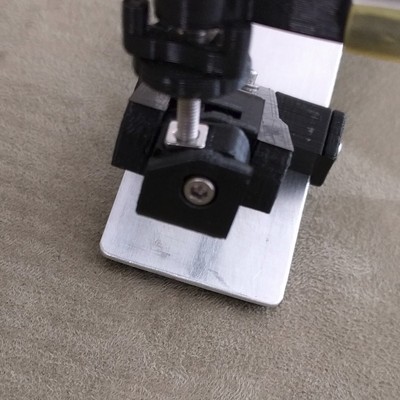
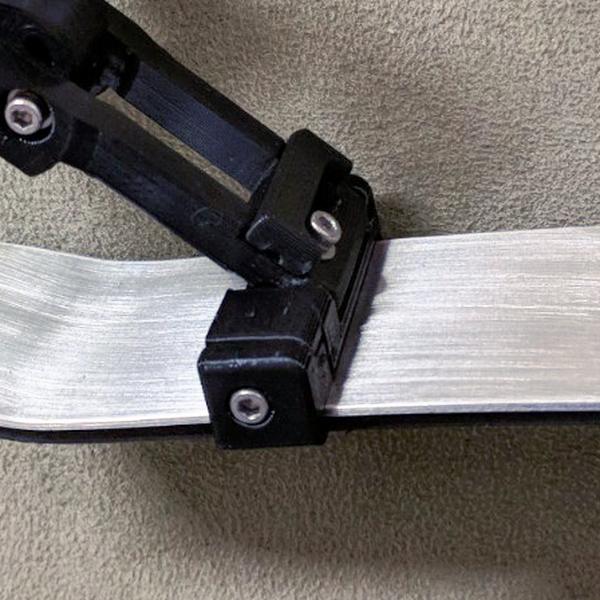
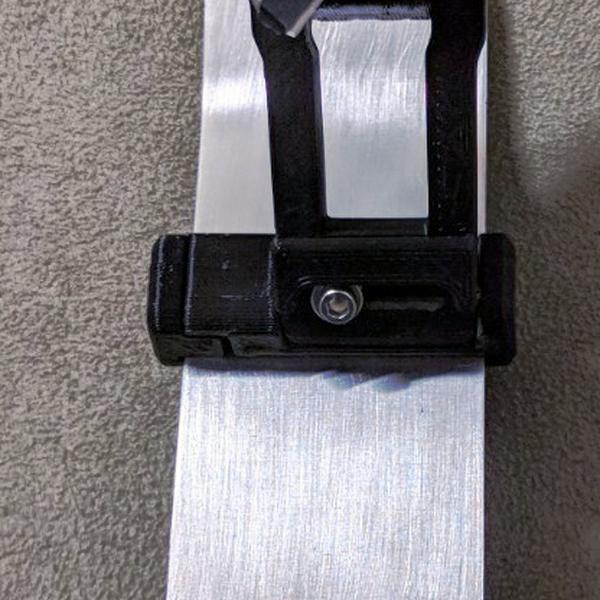
The plate connector
The plate connector mates the two halves of the shoulder plate, tightened by thumbwheel.
The violin plate grips
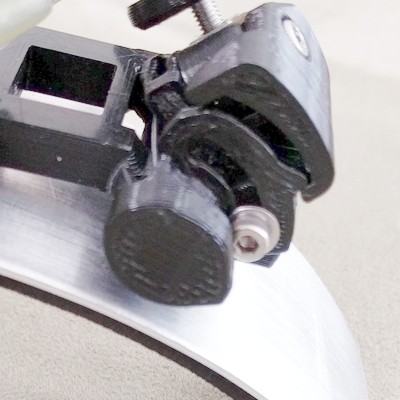
The violin plate grips are adjusted to fine tune the shoulder plate height at each end.
The spin stop is linked to the plate grip and moves with it up and down the bolt.
At the appropriate plate grip height,
a thumbwheel is locked against the spin stop - this stops vertical movement and limits swiveling of the plate grip.
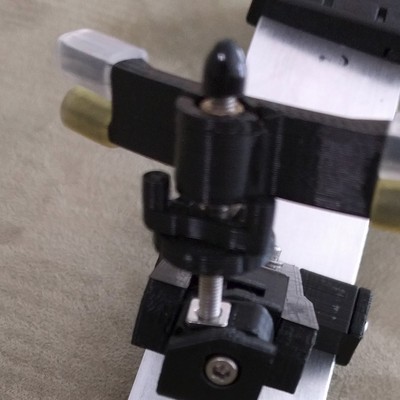
The plate grip moves .5 mm
vertically for each full turn.
How to set up the shoulder rest
The basic steps to set up the shoulder rest
- Assemble the two halves of the shoulder plate into one piece -
insert the lower plate half into the connector assembly
and tighten the thumbwheel.
- The spring loaded foot should aways be the upper foot (shoulder side).
- Bend the shoulder plate to fit your chest.
- Adjust the hinged legs to set the approximate height.
- Slide the foot assemblies to the approximate position on the shoulder plate.
- Adjust the lower end vertical bolt tilt to be vertical, sighted from the side of the shoulder rest.
- Adjust the tilt of the two vertical bolts, sighted from the end of the should rest, so that you get the desired tilt and the two bolts are parallel.
- Fit the shoulder rest on the violin and slide the foot assemblies so that the vertical bolts are parallel, sighted from the side of the shoulder rest.
- Adjust the spring force bracket so that the stop is approximately in the middle of its range.
- Adjust the height of the plate grips on the vertical bolts.
- Start over to fine tune everything - this is important because later adjustments can shift earlier adjustments.
Check these adjustments before stressing the mounted shoulder rest.
- The plate grips should be parallel when sighted from the end of the shoulder rest to ensure that the violin plate fully sits
in all four plate grips vees.
- The vertical bolts should be perpendicular to the violin plate edges so that the plate grips do not touch the violin rib or bottom of the plate.
- The spring force stop should be at least halfway up the range to ensure sufficient force. If you make this too high, you will limit the opening of the plate grip, needed to install the shoulder rest.
- All bolts should be snug.
- The fixed end vertical bolt bracket has two bolts. These should be tightened a bit beyond snug. This joint takes a lot of stress if you clamp your chin/shoulder and if it releases the shoulder rest could collapse.
- The end tilt adjustments should be tightened a bit beyond snug.
How to replace the plate grip covers
Use Alliance #73 or #74 (3/8 x 1/32 inch), Pale Crepe Gold rubber bands
(Alliance Advantage also works well). These are readily available on the
internet, large boxes for under $20.
|
|
|
|
|
|
|
|
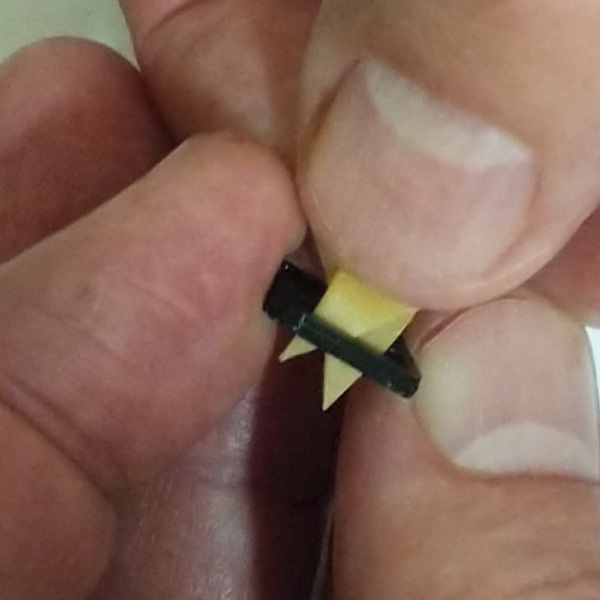
Cut segments of a rubber band (at least one inch long) with diagonal ends.
Locate the smooth/flat and curved/rough sides of an original collar.
Newer collars have a smooth/flat side and a ridged/rough side. The ridge (along the
middle of the collar) is not necessary but
it makes it easier to align the collar vertically.
|
|
Thread both ends of a rubber band segment into a slot on the smooth/flat side of the
collar for the original collar
or the ridged side of the newer collar.
|
|
| | | | |
|
| | | | |
|
|
|
|
|
|
|
|
|
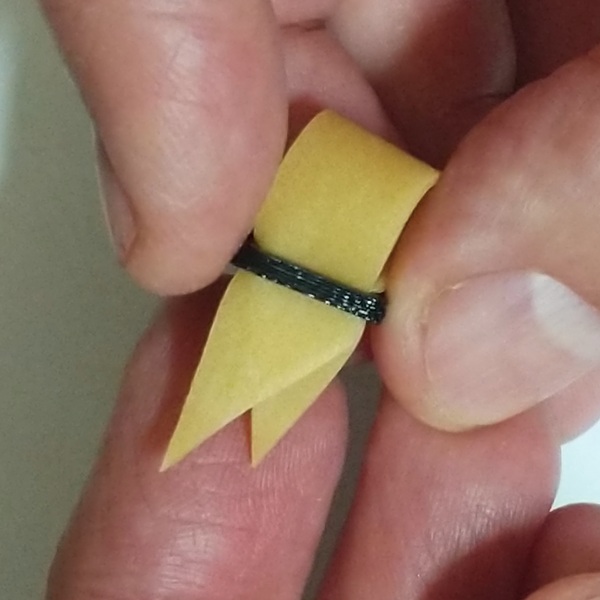
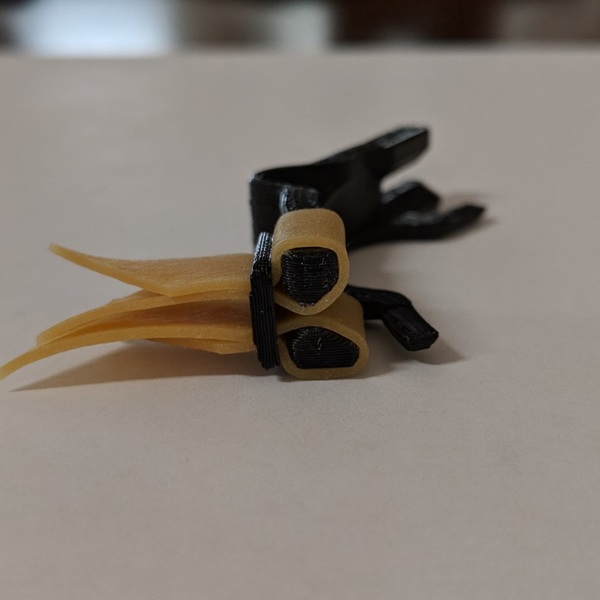
Pull the cut ends of the rubber band through the slot together, past the diagonal cut.
|
|
Pull on the rubber band on both sides of the collar to align and relax the rubber band.
|
|
| | | | |
|
| | | | |
|
|
|
|
|
|
|
|
|
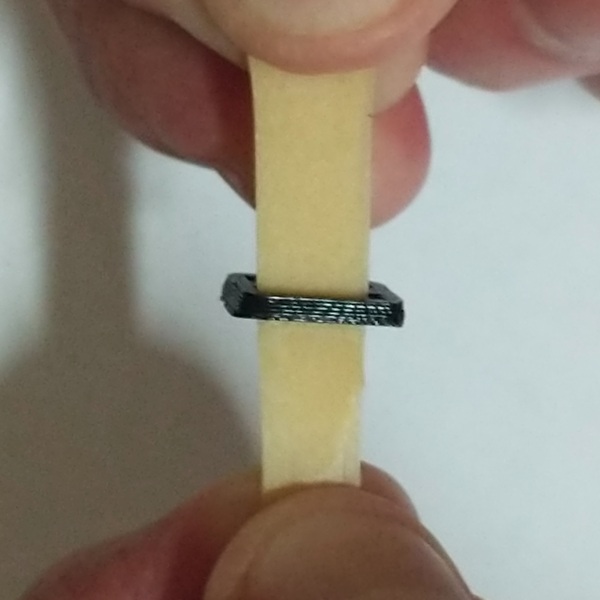
Repeat for each slot.
|
|
Slide the collar onto the plate grip.
|
|
| | | | |
|
| | | | |
|
|
|
|
|
|
|
|
|
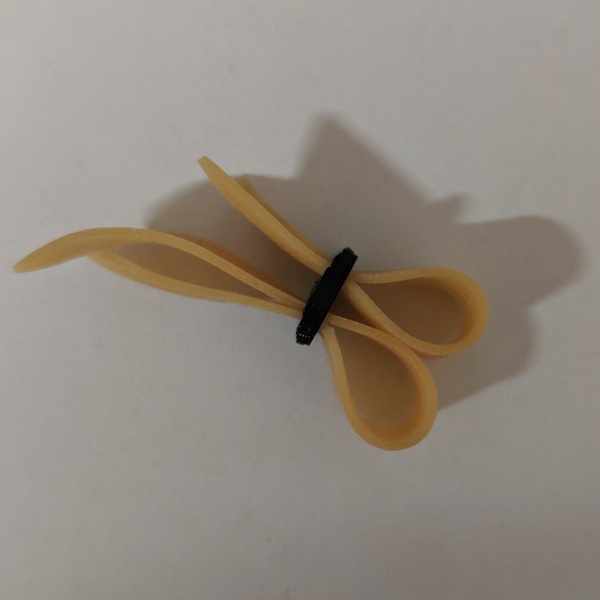
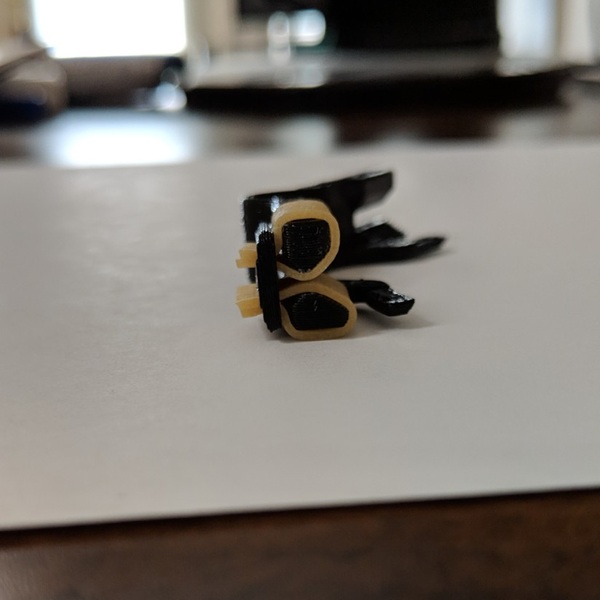
Pull the cut ends of the rubber bands against the collar to tighten
them around the plastic. Tighten just enough to conform to the plastic,
leaving the rubber unstressed. If you overtighten the rubber you can see
that is thinner - pull back on the collar to loosen it. Small air gaps
are not a problem - when in place the violin plate grip is spring loaded
against the rubber and the rubber is pressed against the plastic in the
correct geometry.
|
|
Cut the excess rubber band with scissors, leaving a short amount that can be pulled out if needed.
|
|
Design
This shoulder rest is an original design by Cary Ravitz.
New violin shoulder rest concepts
- The feet slide along the shoulder plate for adjustment of violin position up and down the chest.
- The violin plate grips are formed by latex tube or strip stretched over horizontal extrusions for precise geometry.
- The force of the plate grip on the violin plate is controlled by an adjustable torsion bar spring for consistent force.
- Swappable shoulder plates with different shapes and lengths.
Other Design Features
- Malleable aluminum shoulder plate.
- The upper foot is mounted on a spring loaded hinged extension to control the force of the plate grip.
- Both feet are mounted on a hinged extension that lets you adjust height and folds for storage.
- Both violin plate grips are adjustable vertically by spinning on a bolt.
- Both violin plate grips have spin limiting bars that move out of the way to allow height adjustment of the grip.
- Each violin plate grip has a left and right grip that contacts the violin plate edge at 45 degrees above and 60 degrees below the middle and a bottom stop that is normally not in contact the violin plate.
- The shoulder plate splits in half for easy storage.
Design patent on the first generation US D792506.
Note these expired patents on two of the features of this shoulder rest.
US5419226, Kun folding feet.
DE2848610, BonMusica hooked shoulder plate.
Construction
The upper shoulder plate is .05 inch 3003-H14 aluminum, either 1.375 in x 3.75 inch or 1.375 in x 4.75 inch.
The lower plate is 1.375 in x 4.75 inch.
4 mm sticky back foam backs the plates.
The bolts are either M3 button head or M2.5 cap head. Both use a 2mm hex wrench. All nuts are square, thin DIN 562.
All of the plastic parts are printed (using a Lulzbot Mini) with ABS plastic.
Plastic parts
- 1 - shoulder plate joint
- 1 - shoulder plate joint left tightener
- 1 - shoulder plate joint right tightener
- 1 - shoulder plate joint knob
- 2 - shoulder plate clamp
- 2 - base (upper, lower)
- 1 - upper foot leg
- 1 - lower foot leg
- 1 - upper foot vertical bolt angle bracket
- 1 - upper foot force control bracket
- 1 - lower foot vertical bolt angle bracket
- 2 - tilt bracket (upper, lower)
- 2 - violin plate grip spin stop
- 2 - violin plate grip spin stop lock thumbwheel
- 2 - violin plate grip
- 1 - hex wrench handle top
- 1 - hex wrench handle bottom
Standard parts
- 2 - M3 square nut - violin plate grip spin stop
- 2 - M3 square nut - violin plate grip spin stop lock nut
- 2 - M2.5 x 7mm cap head bolt, square nut, washer - upper, lower hinged bracket height stop
- 1 - M2.5 x 7mm cap head bolt, square nut, washer - spring force bracket
- 2 - M2.5 x 15mm cap head bolt, square nut, washer - upper, lower third hinge
- 2 - M2.5 x 15mm cap head bolt, square nut - foot to shoulder plate tightener
- 2 - M2.5 x 22mm cap head bolt, square nut, washer - lower second hinge
- 1 - M2.5 x 16mm cap head bolt, square nut - shoulder plate joint right tightener
- 1 - M2.5 x 22mm cap head bolt, square nut, washer - shoulder plate joint left tightener
- 2 - M2 x 35mm stainless steel dowel pin - upper, lower first hinge
- 1 - M2 x 30mm stainless steel dowel pin - upper middle hinge
- 1 - 2mmid, 2.5mmod x 13mm brass tube - upper middle hinge
- 1 - M3 x 35mm button head bolt, square nut - upper foot violin plate grip bolt
- 1 - M3 x 40mm button head bolt, square nut - lower foot violin plate grip bolt
- 1 - .8mm music wire torsion bar (25.5mm between arms) - upper foot spring
- 2 - 2mmid, 4mmod x 7mm silicone tube - violin plate protector
- 4 - 2mmid, 4mmod x 7mm silicone tube - violin plate grip bottom catch
- 8 - 4mmid, 6mmod x 10mm latex tube - violin plate grip
- 2 - M3 x 10mm x 4.8mmod brass threaded insert nut (cut) - violin plate grip internal nuts
- 2 - 2.5mm id soft screw cap - violin protector on plate grip bolt
- 1 - 2mm hex key - hex wrench
- 2 - M3 x 16mm button head bolt, square nut - hex wrench
Last modified 6:30 PM, 14 Jul 2023 - File size 21K - Count 14005